If you’re running a one-person business, you’ve probably felt the pressure to use AI for everything—but between daily client work, endless tool lists, and unclear costs, it’s hard to know where to start without wasting time or money. This article skips the hype and breaks down the AI trends that actually matter for freelancers and solo founders in 2026, with a focus on automation and no-code workflows you can act on without a developer. We’ll look at what’s changing, which tools are worth a closer look, and how to test them in a way that fits a busy, budget-conscious operation.
What Solo Founders and Freelancers Need to Know About AI in 2026
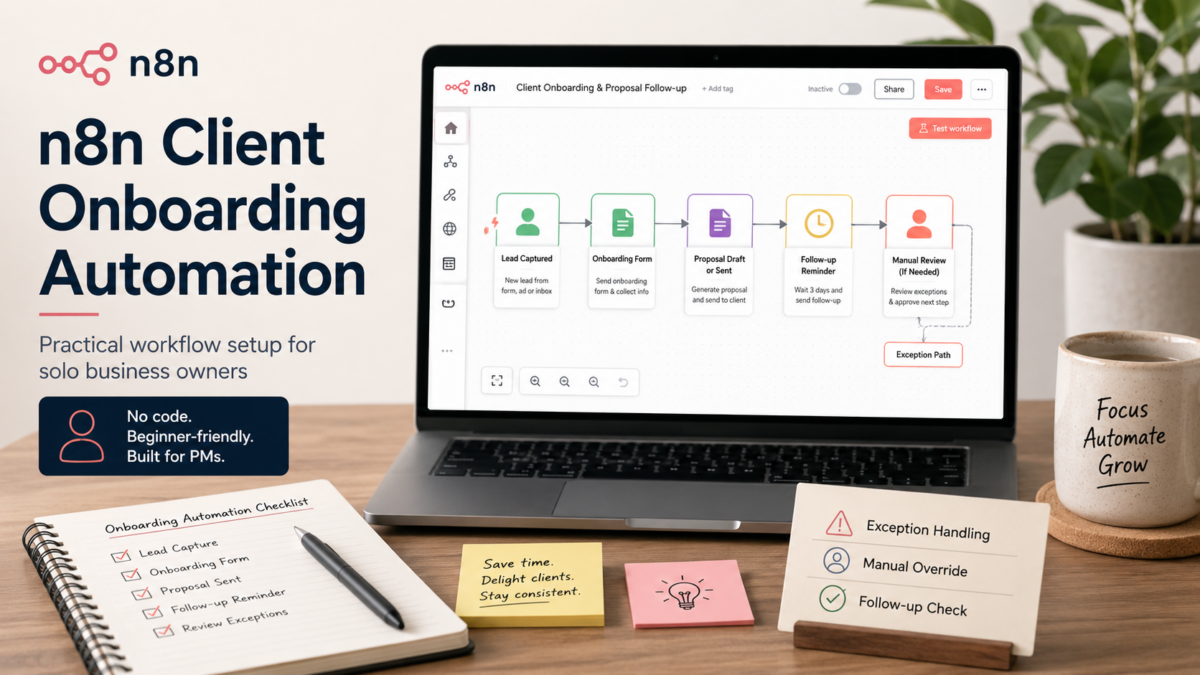
The core shift isn’t about having more AI tools—it’s that solo operators can now run tasks that used to require a small team. General-purpose assistants like ChatGPT and specialized platforms like Jasper have become reliable enough for client-facing work, while no-code automation platforms let you connect those tools to your everyday workflows. That means a freelancer can automate personalized follow-ups, categorize leads, or generate draft proposals without writing a line of code. But there’s a catch: the same tools can produce generic output and create more busywork if you skip testing them against real client expectations first. For anyone with limited time, the priority is picking one automation that replaces a repetitive manual step—not trying to automate everything at once.
|
💡 Before you jump in |
Why AI Trends Matter Now for Solo Businesses
Solo operations aren’t a niche anymore. Recent data shows over 50 million Americans are involved in freelance or solo ventures, a 15% increase from 2025, driven by remote work normalization, economic uncertainty pushing side hustles, and tech stacks that lower entry barriers. At the same time, AI tools are no longer a nice-to-have—they’re becoming the difference between scraping by and scaling sustainably. Solo founders are now launching products without VC funding, with about 38% of these startups having no outside investment, thanks in part to generative AI and no-code platforms. For freelancers and small business owners, this means competition is rising from people who spend less time on manual work and more on client relationships and creativity. If you’re still doing everything by hand, you risk falling behind not because of a lack of skill, but because your available hours haven’t changed.
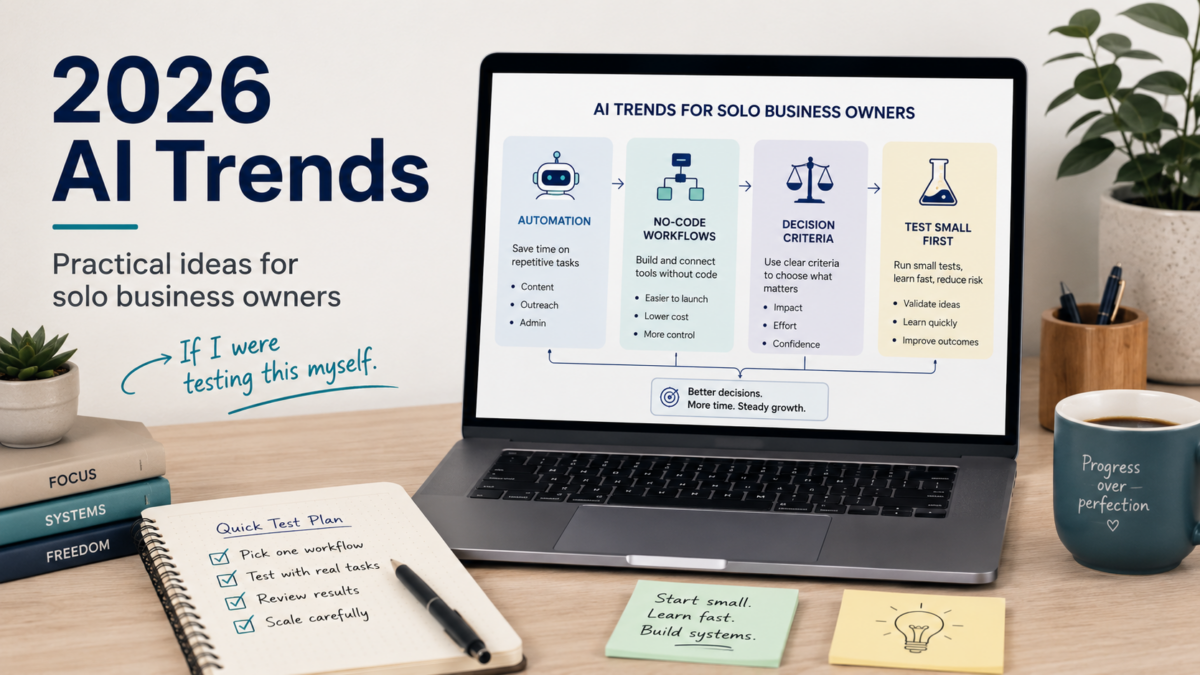
Key AI Trends and Tool Categories Worth Knowing
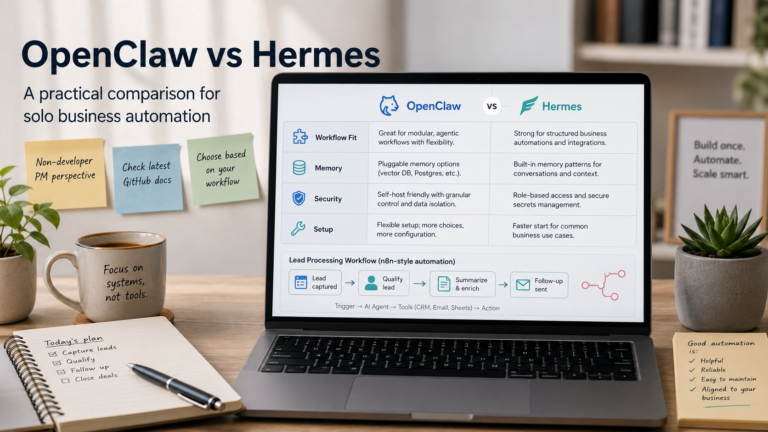
From a non-developer PM perspective, the trends that actually affect daily work fall into three practical buckets. First, general-purpose AI assistants like ChatGPT can now handle content drafting, research, and even light data analysis with enough reliability to save hours each week—but you’ll need to fine-tune prompts to avoid sounding generic. Second, specialized AI tools for writing, design, and coding (Jasper for marketing copy, and emerging design aids) let you offer new services or speed up existing ones. Third, no-code automation platforms connect these AI tools to your existing apps, so a new lead from a web form can automatically trigger a personalized draft email ready for your review. The catch is that many tools add up in cost quickly, and the learning curve for connecting them can be steeper than tutorials suggest. For a solo business owner, I would look for tools that charge per usage rather than per month when testing, so you aren't locked in before you prove value.
| Trend / Category | What it helps with | Typical risk for solo users |
|---|---|---|
| General-purpose AI (e.g., ChatGPT) | Content drafts, research, client communication outlines | Output can feel generic; prompt tuning takes trial and error |
| Specialized AI (e.g., Jasper for copy) | Faster high-quality writing, design, or niche tasks | Monthly cost without enough volume makes ROI unclear |
| No-code automation (e.g., n8n, Zapier, Make) | Connecting apps and AI steps into a repeatable workflow | Setup time and error handling can be time-consuming upfront |
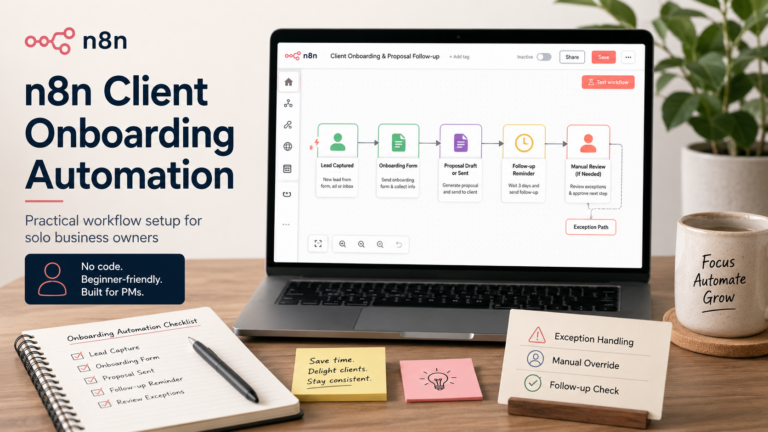
How to Test an AI Automation in One Afternoon: A Step-by-Step Example
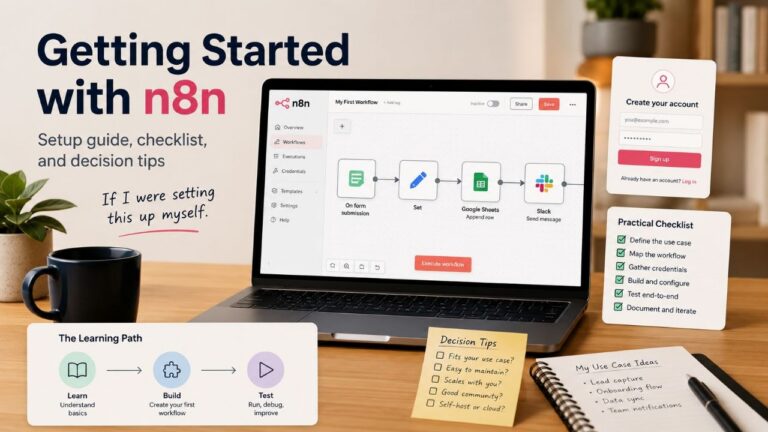
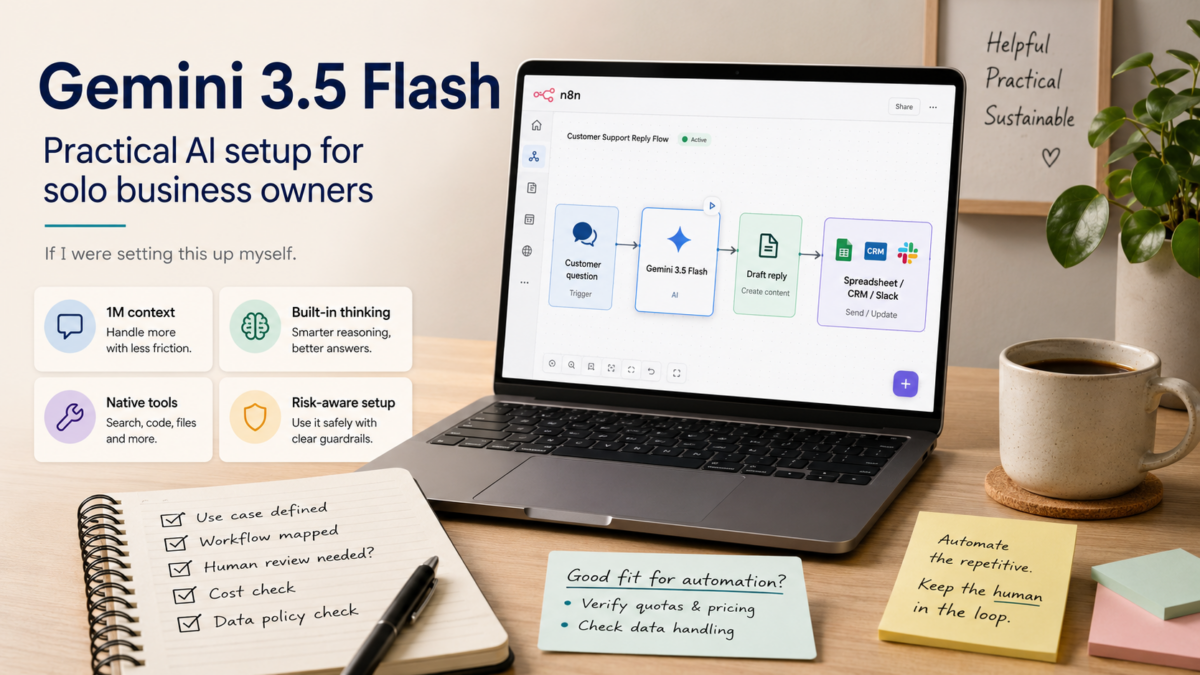
If I were setting this up myself as a freelancer, I'd start with something small but immediately useful—like automatically drafting a personalized reply when a new inquiry comes through a website form. This uses no-code automation to connect a trigger (form submission) with an AI step and store the result for my review. It costs almost nothing to test and avoids sending AI-generated emails to clients without human oversight.
| Step | Action |
|---|---|
| 1 | Pick an existing form that already gets inquiries |
| 2 | Sign up for a no-code platform and prepare the trigger |
| 3 | Add an AI node with a simple prompt |
| 4 | Save the AI output for manual review |
| 5 | Example prompt for drafting a personalized reply |
| 6 | Test with one real inquiry and measure |
- Pick an existing form that already gets inquiries
Use a contact form on your website or a tool like Google Forms. The goal is to have a real inbound channel, not a hypothetical one. - Sign up for a no-code platform and prepare the trigger
Create a free account on n8n (self-hosted or cloud trial) or Make. Set up a new workflow that starts with a webhook or a built-in app trigger for your form tool. This will catch new submissions automatically. - Add an AI node with a simple prompt
Insert a node that calls an AI API, such as OpenAI’s. Use a prompt like the one below—keep it short and focused on the exact reply you want to review. - Save the AI output for manual review
Connect the AI node to a Google Sheets or Airtable node that logs the date, client name, original message, and AI-generated draft. Do not send the email automatically; you’ll review and edit it first. -
Example prompt for drafting a personalized reply
You are a helpful assistant for a freelance [your service]. The client sent this message: "{{form_message}}". Write a friendly, 3-sentence reply that thanks them, asks one clarifying question, and proposes a 15-minute call next week. Do not include any links or placeholders. Tone: professional but warm. - Test with one real inquiry and measure
Let the workflow run on a single submission. Check the saved draft—did it need heavy editing? If it saved you 5–10 minutes, note that. If not, tweak the prompt and run it again before expanding to more triggers.
|
💡 Safety note |
Deciding Which Trend to Act On First for Your Business
Not every trend fits every solo business. A copywriter might need AI content tools, while a local service business might get more from workflow automation. Use the table below to match your main pain point to the category that gives the fastest time saving with the least complexity. For a freelancer juggling multiple clients, I would start with a single automation that reduces back-and-forth scheduling or follow-ups. For a small local business, I would first check whether existing tools (like calendar apps or email templates) can be connected before adding a new AI subscription.
| Your situation | Most practical next step | Things to watch |
|---|---|---|
| I spend hours writing similar emails/proposals | Try an AI drafting step in your workflow with manual review | Don't skip prompt testing—generic drafts cost you credibility |
| I lose track of follow-ups and client details | Build a simple no-code automation linking form to a task + log | Start with one integration; multi-step flows break more easily |
| I want to offer a new service but lack time to learn | Use specialized AI tools to create a sample deliverable, then assess | Clients may still expect your expertise, not just AI output |
Checklist and Caveats Before Adopting New AI Tools
Before committing to a paid plan or spending a weekend on setup, run through this checklist. It’s easy to underestimate how much maintenance a new automation needs once real-world data hits it.
- Data privacy: Review the AI tool’s data usage policy before entering client information. Some free tiers use inputs for training.
- Output quality: Run a test batch of at least 5 real-world scenarios and compare the AI output to what you’d do manually.
- Cost trajectory: Check whether pricing scales reasonably as your usage grows. A tool that’s cheap at 100 tasks can become expensive at 1,000.
- Time to maintain: Plan for a regular 30-minute review of your automations—broken connections, API changes, or prompt drift happen.
- Fallback: Keep your manual process for a few weeks in parallel so a failed automation doesn’t cost you a client.
|
💡 If a tool feels like extra work, pause |
Frequently Asked Questions
Do I need coding skills to use these AI automation trends?
Not necessarily. No-code platforms like n8n, Make, or Zapier offer visual builders, and many AI tools provide simple web interfaces. You may need to read documentation and handle API keys, but you don't need to write code from scratch. If you can follow a tutorial and copy-paste a prompt, you can get started.
How much does it cost to test an AI automation for a solo business?
Most tools have a free tier or low-cost pay-per-use option. For a simple workflow like the one described, you might spend $0–$10 on API credits while testing. The bigger cost is your time setting it up. Start with a free trial and measure results before upgrading.
Which AI trend should I try first as a freelancer?
Focus on the task that steals the most time weekly. If it's writing client emails, try an AI draft step. If it's project follow-ups, test a no-code automation. Avoid chasing trends that don't directly reduce your repetitive workload—even if they look impressive.
Is my client data safe if I use AI tools for automation?
It depends on the tool. Check the privacy policy and terms of service: some AI providers use your inputs to improve models unless you opt out or use enterprise versions. For sensitive data, choose tools that offer data processing agreements and don't retain inputs beyond the session.
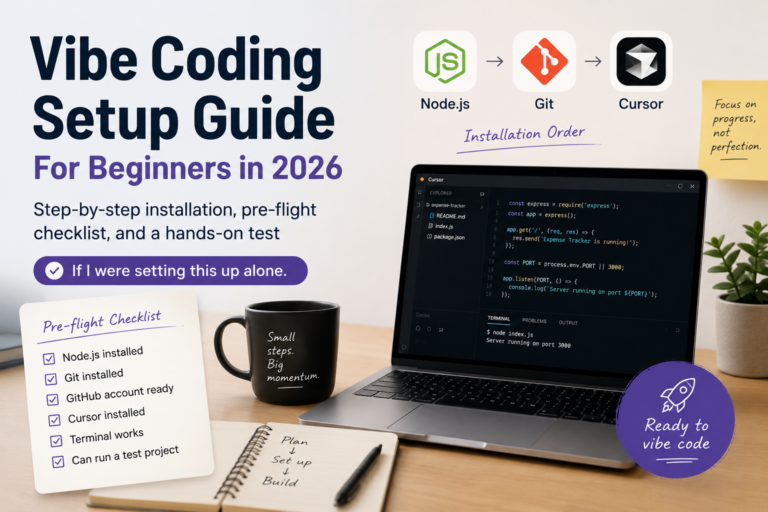
What's vibe coding and is it relevant for a non-technical solo business owner?
Vibe coding refers to using AI to generate entire codebases or apps through natural language prompts, often without deep programming knowledge. It’s fueling solo businesses that want to build custom tools quickly. For a non-developer, it can help prototype simple internal tools, but it still requires critical thinking to test and secure the output. It’s worth exploring if you have a specific tool idea that off-the-shelf software doesn’t solve.
Wrap-Up
The AI trends that matter for solo business owners in 2026 are less about the latest model names and more about picking the one or two workflow improvements that clear up real time for client work. Start by identifying a single repetitive task that bugs you weekly. Test a no-code automation that pairs a trigger with an AI step, and keep the manual review in place until the output earns your trust. Skip any tool that takes longer to maintain than the task it replaces. If you run into walls, come back to the checklist and scale back—practical progress, not tool adoption, is what pays the bills.